
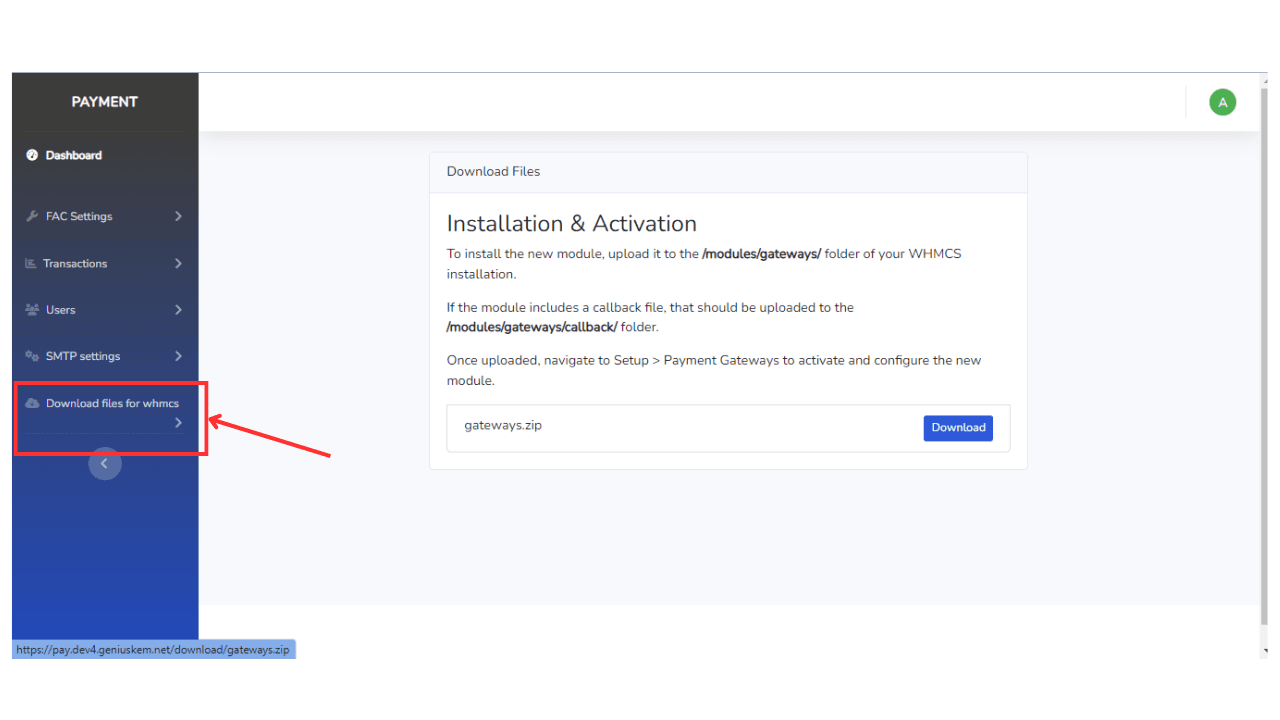
Finally, go to the “Download files for the WHMCS” to download the module files for your site. This .zip contains two files, which we need to add to our WHMCS application in the appropriate directories.
We will extract the .zip and we will have the two files that we will upload later.
Once the files are downloaded, go to your cPanel and find the domain for your WHMCS site. Follow these steps to upload and configure the files:


Once the files are downloaded, go to your cPanel and find the domain for your WHMCS site. Follow these steps to upload and configure the files:
Navigating to the File Manager #
1. Use your credentials to access your cPanel dashboard and go to the domain option. Navigate to the domain for your WHMCS site and click on the document root column to manage its file. This will take you to the root directory of your site.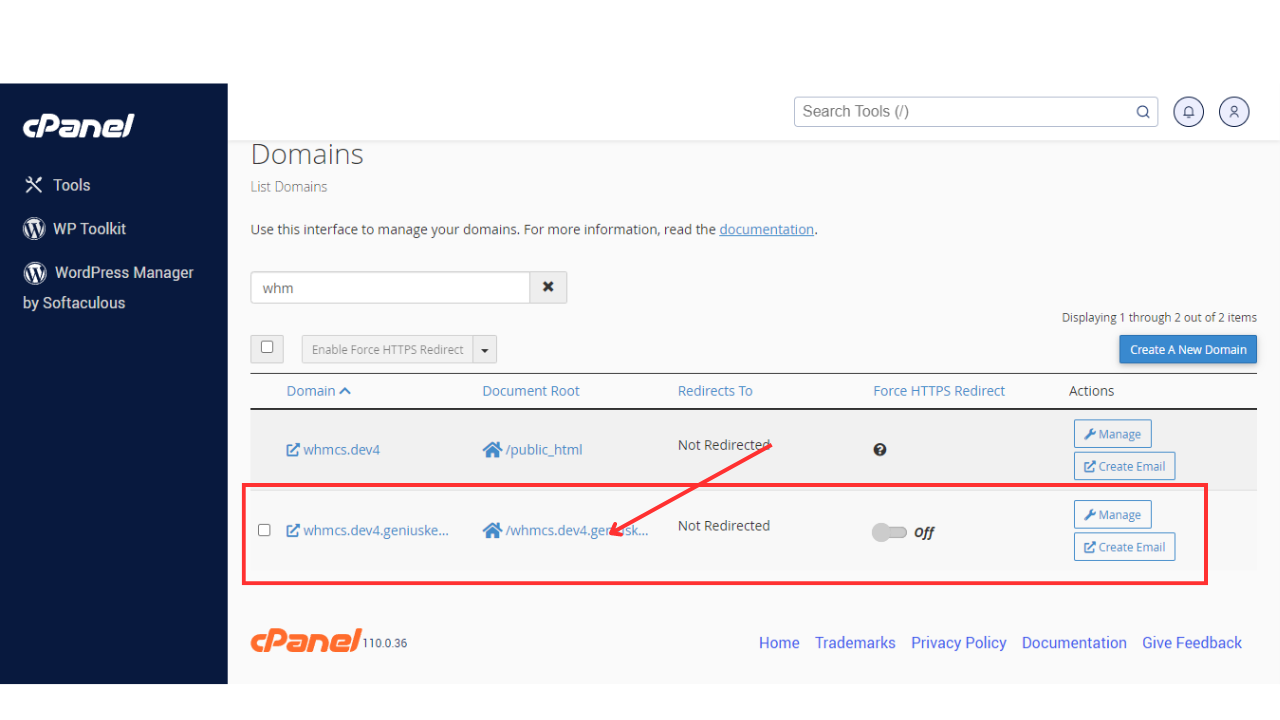

Uploading the First File #
1. From the root directory, go to the
modules folder, then into gateways.

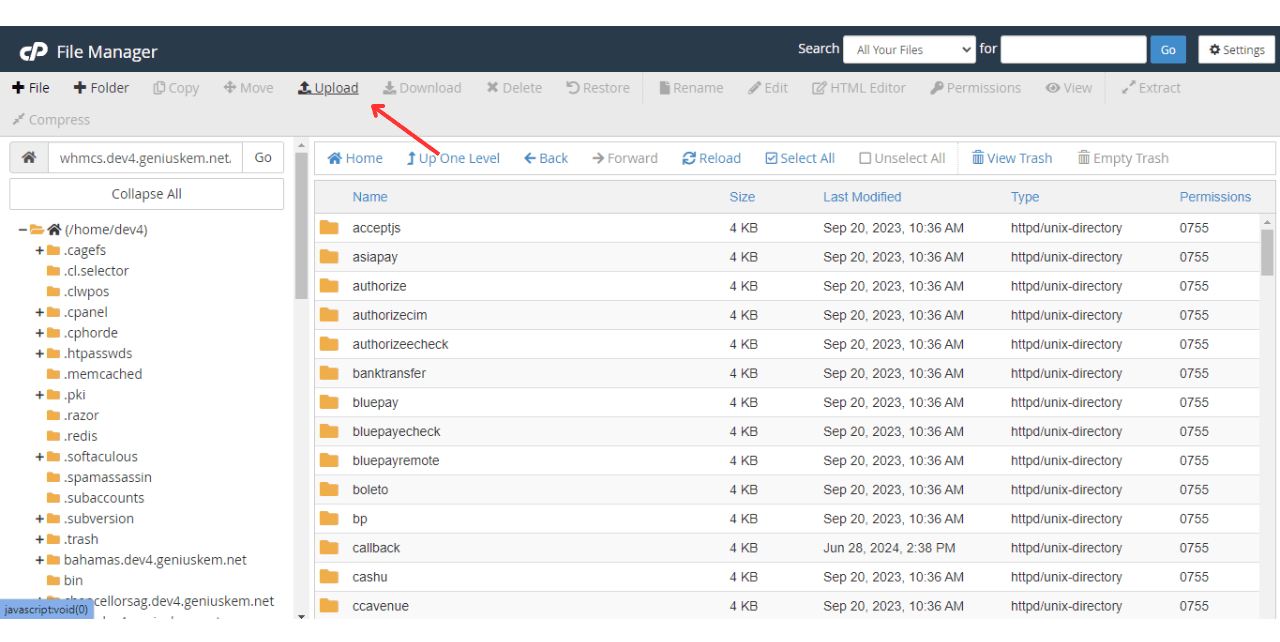
2. Upload the .zip File: Click on “Upload,” and we are going to take the first file from the .zip file that we downloaded before the first file should be in the .zip file you downloaded and extracted earlier.
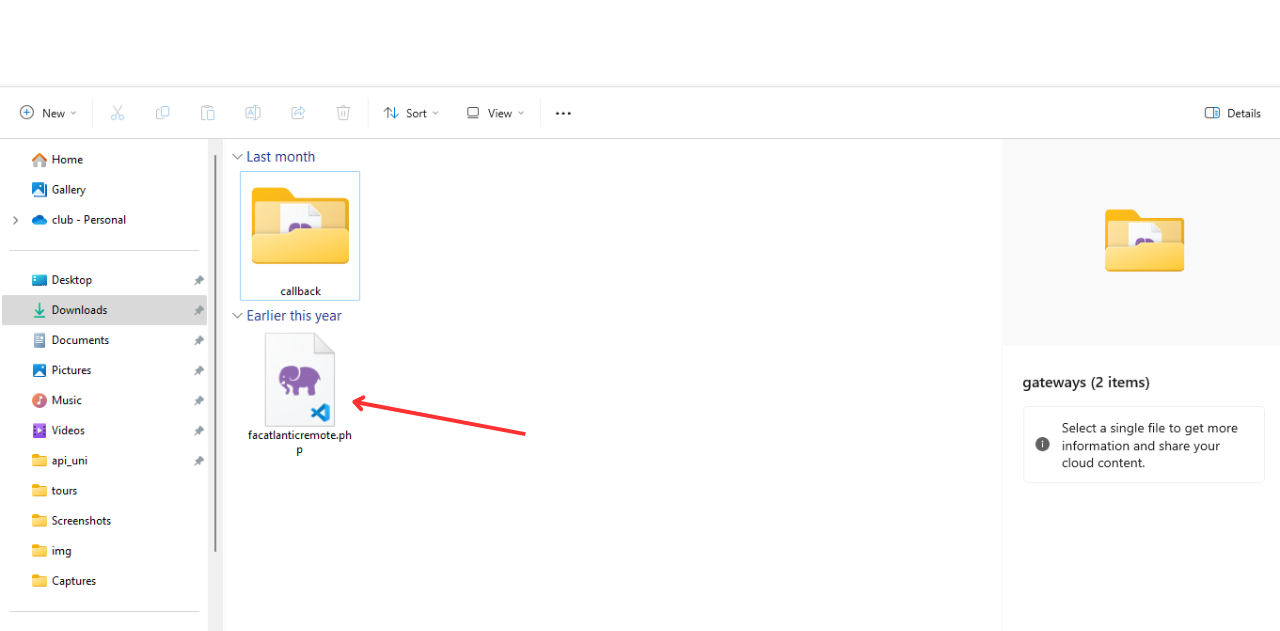

Uploading the Second File #
1. Navigate to the Callback Directory: Navigate back to the root directory to ensure you’re starting fresh. Then follow the pathmodules > gateways > callback.
2. Upload the Callback File: Click on “Upload File” and select the file from the callback folder within the .zip archive you downloaded before.


Now that both files are uploaded and extracted in the correct directories, your module files are ready to use. You can now go to your WHMCS site to verify the module installation and configuration. If everything is set up correctly, the module should be functional and ready for use.


