
When configuring the payment gateway settings for First Atlantic Commerce (FAC) on your WooCommerce website, it’s essential to understand each field to tailor the setup according to your preferences. Below is a breakdown of the settings:
Enable/Disable Payment Gateway
This checkbox allows you to toggle the availability of the FAC payment gateway during the checkout process on your website.
Enable/Disable FAC Test Mode
Choose whether to use FAC’s Testing Server or Production Server for transactions. Testing mode is for trial transactions with specific testing credentials, while production mode is for real transactions with live credentials.
Payment Method
Select between “Authorize & Capture Payments Immediately” or “Authorize then Capture Payments Manually Later” options based on your workflow preferences.
Enable/Disable 3D Secure
Activate 3D Secure technology during payment processing if supported by your bank and merchant account.
Enable/Disable Address Verification (AVS):
Enable Address Verification to enhance security by matching the billing address with the cardholder’s address.
Title of Payment Method
Set the title displayed to customers during checkout for this payment method (defaults to “Credit Card”).
Description of Payment Method
Describe the payment method shown to customers during checkout (defaults to “Pay securely with your credit card”).
Credit Card Tokenization
Enable to allow customers to save their credit card details for future transactions without storing the actual card data.
Supported Card Types
Select the card types supported by your bank and merchant account for display during checkout.
FAC Merchant ID and FAC Merchant Processing Password
Enter your FAC ID and corresponding processing password for identification and authentication.
Enable Kount
Activate Kount fraud detection technology for enhanced security during transactions.
Show FAC & 3D Secure Logos At Checkout
Display the FAC and 3D Secure logos on the checkout page as required by FAC.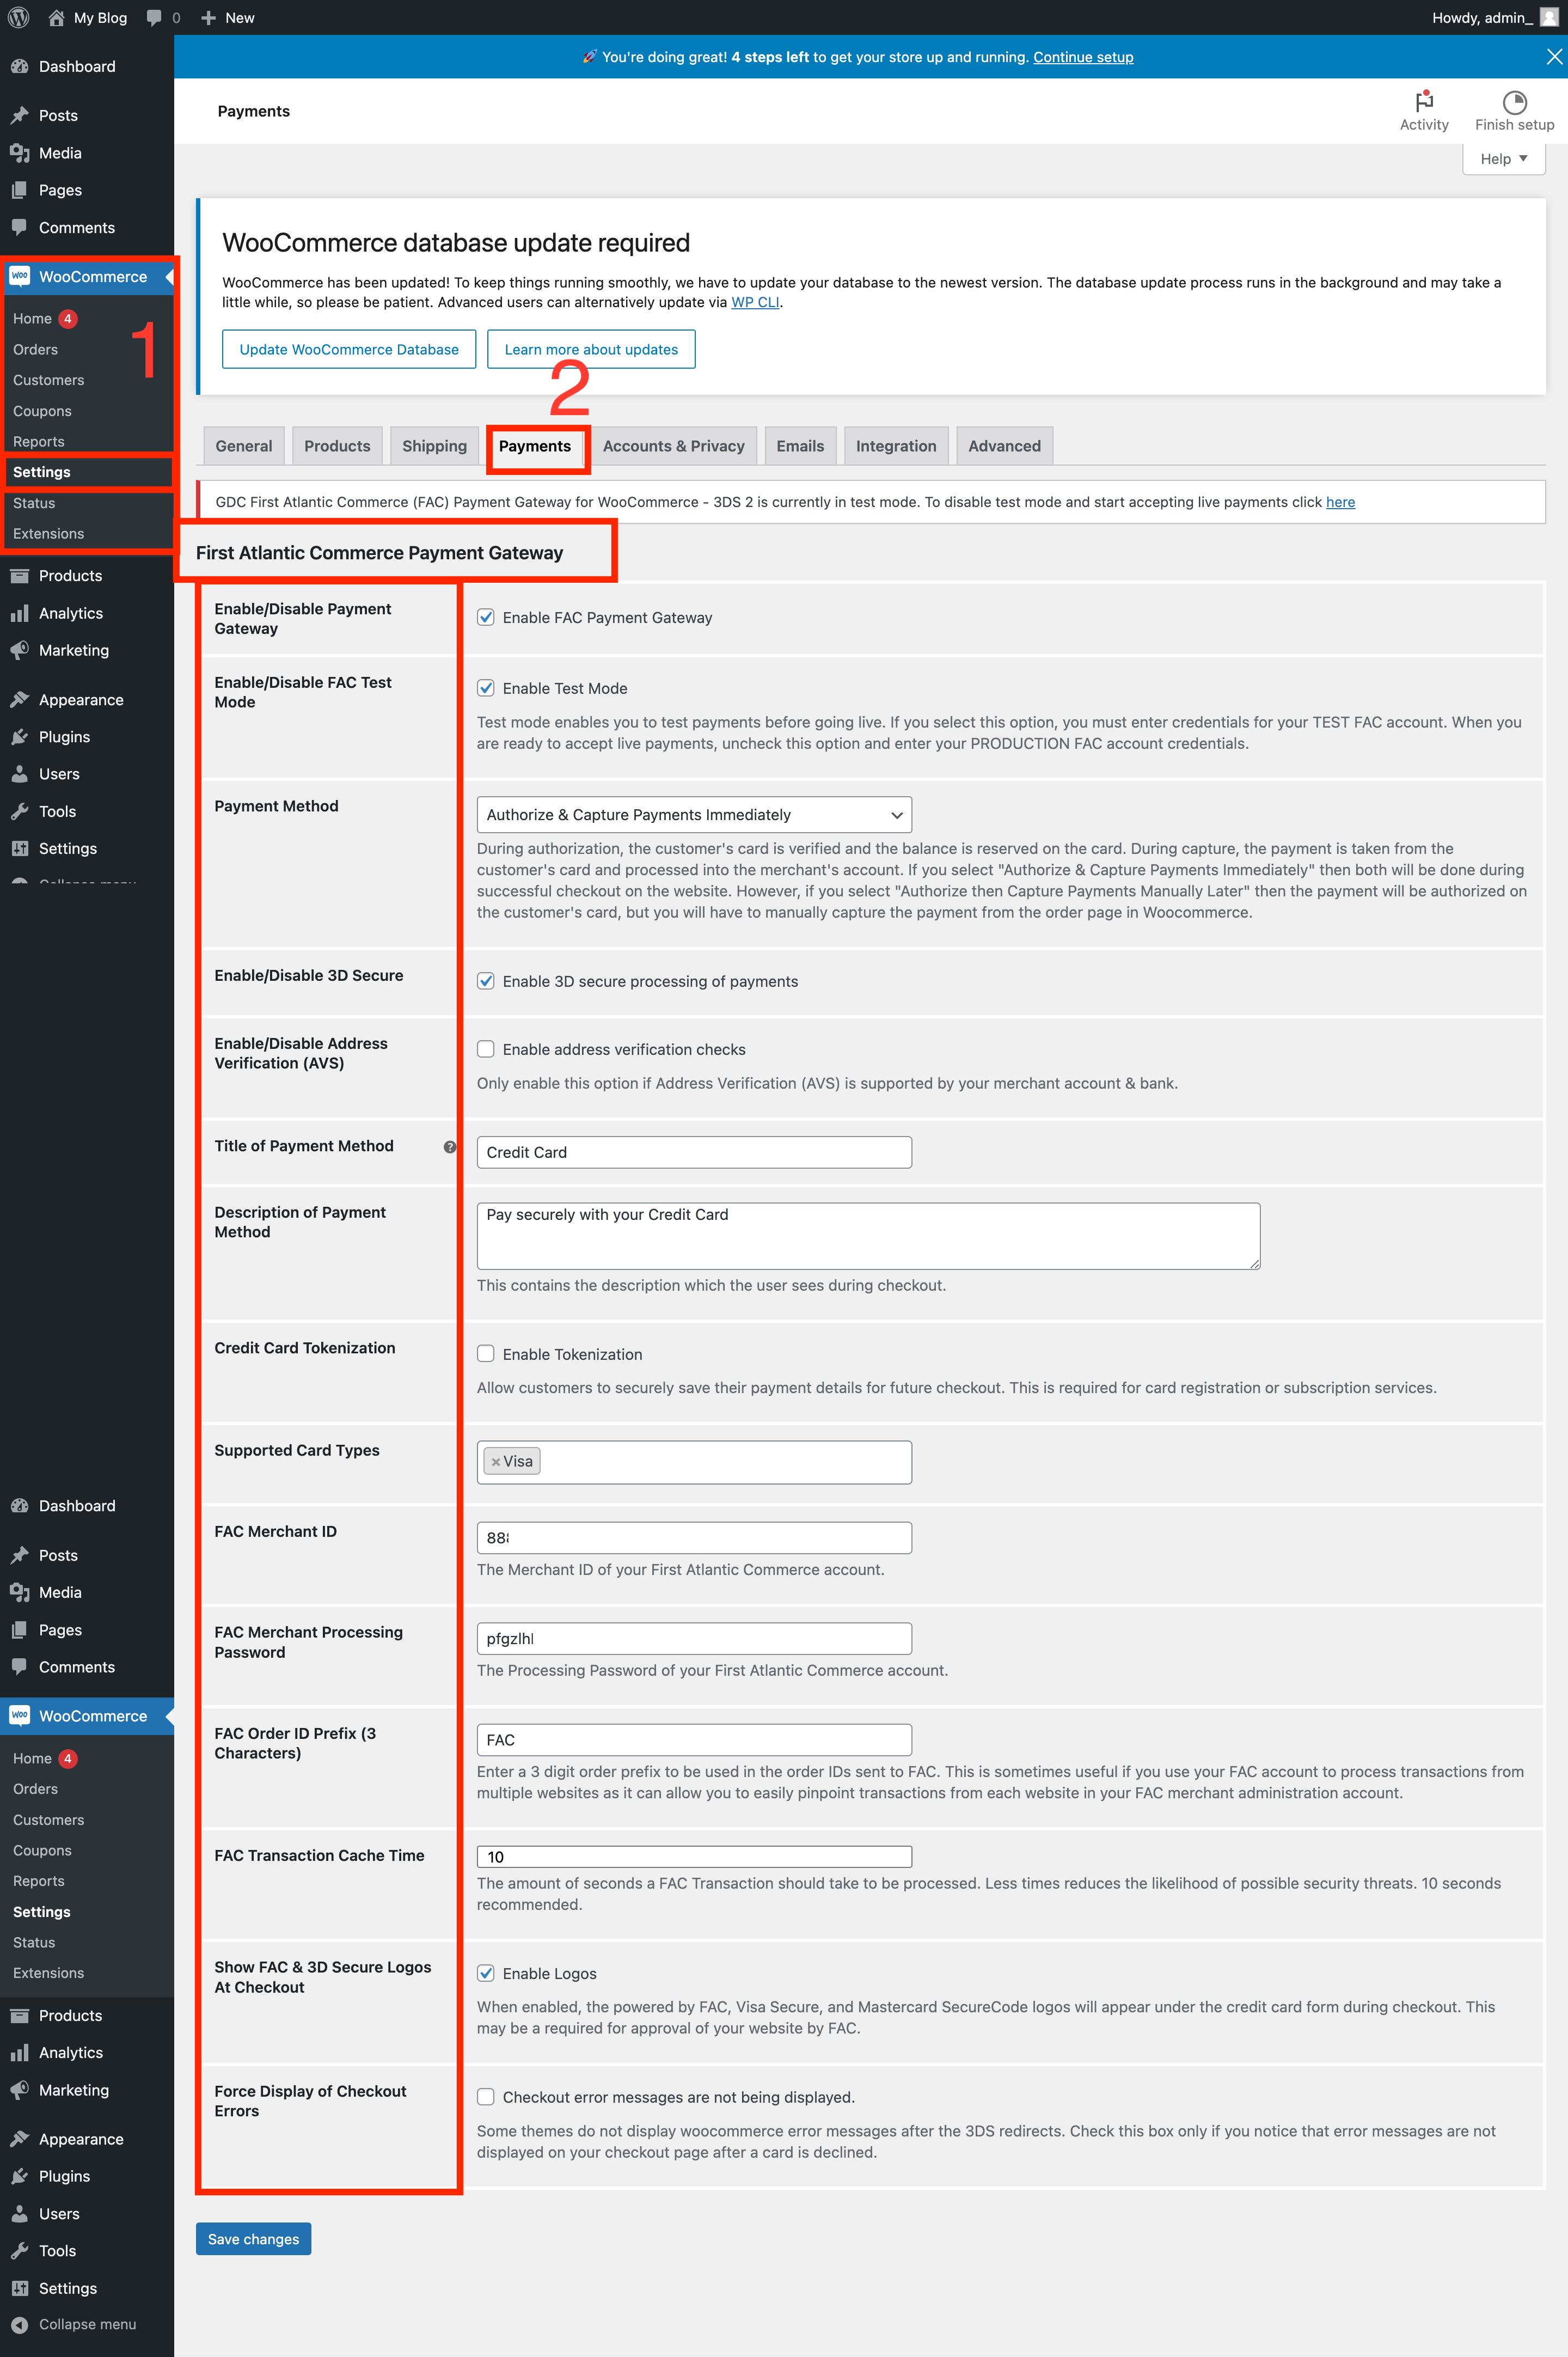
Remember to review each setting carefully and make adjustments according to your business requirements. Additionally, follow any necessary integration steps provided, such as modifying the plugin code for Kount integration.


